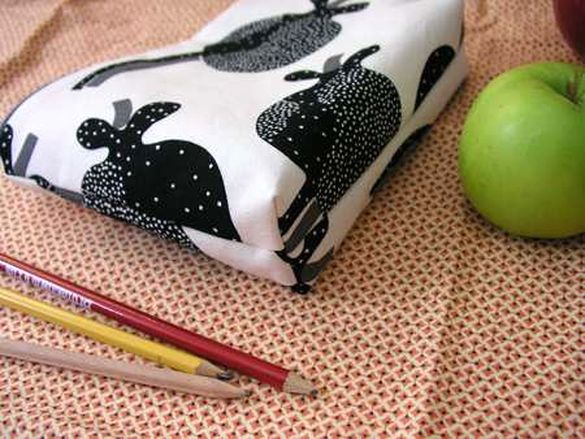
It’s back-to-school time, and it’s hard not to have school supplies on the brain even if school days are nowhere in sight for some of us! Inspired by the good old-fashioned pencil case, I thought it would be fun to sew a lined, zippered pouch that you can use for pencils, makeup, electronics or anything else you need to organize and tuck away.
The great thing about this bag is that once you understand the basic construction, you can easily make it any size you like. Try a short, long version with a wide base for knitting needles, or a flat bag for electronic cords. You can use oilcloth for the lining to create a waterproof makeup bag, or try stitching a label to the outside to indicate what’s hiding inside. Let’s get started!
Materials
approximately 1/2 yard of medium or heavy-weight fabric for the bag exterior
approximately 1/2 yard of medium-weight fabric for the lining
standard zipper, at least as wide as your bag will be
scissors
needles
sewing machine
iron
Instructions
1. Cut the fabric.
Decide how large
you want your bag to be and cut two pieces of your exterior fabric and
two pieces of lining fabric to this size, plus 1″ in length and width
for seam allowance. If possible, purchase a zipper that is the same
width as your fabric piece or purchase a longer zipper and cut it to
size. (Note: if your zipper is only 1 to 2″ longer than your fabric
piece, you don’t have to cut it. A small amount of excess zipper length
is okay.)
To cut your zipper to size, zip the zipper closed and place the zipper next to your fabric piece, aligning the top end of the zipper with one corner of the fabric. Place a pin in the zipper at the other corner of the fabric piece.
Set your machine to a narrow, short zigzag stitch and sew back and forth across the zipper teeth several times at the point you marked. (Yes, you can sew right across the zipper teeth — your machine can handle it!)
Then cut the zipper about 1/2″ past the spot you sewed. The stitches will act as a stopper on the end of the zipper. And that’s it!
2. Attach the zipper to the fabric.
Place your zipper face down on the right side of one of the exterior pieces and pin it in place.
Load your machine with a zipper foot (check your machine’s manual for help with this if necessary) and sew the zipper to the fabric.
3. Attach the lining.
Place the lining right-side down over the zipper and pin it in place. Sew it just as you did the previous piece. (You will be sewing directly over the line of stitching you made when attaching the zipper to the exterior piece. The zipper will now be sandwiched in between the right sides of one lining piece and one exterior piece.)
4. Press the seam.
Press the seams you just sewed, folding each piece of fabric back so that the wrong sides are facing each other. (Be careful when ironing near the zipper — after coming in contact with the iron, the metal zipper can get hot enough to burn you.)
5. Attach the next exterior piece.
Place the second exterior piece wrong-side down over the right side of the zipper. Pin it in place, then sew it as you did the other pieces.
6. Attach the second lining piece.
Flip the piece over and pin the lining piece right-side down over the wrong side of the zipper. Saw it in place. The zipper will now be sandwiched between the right sides of the second exterior piece and second lining piece.
7. Iron it flat.
Iron the seams you just made, folding the fabric pieces back so that the wrong sides are facing each other. The resulting piece will have the zipper in the middle, with one exterior piece and one lining piece on each side, and right sides facing out on all the fabric pieces.
8. Fold and sew around the perimeter.
Next, lift each exterior piece and bring them up to meet each other with their right sides together. Also, bring up each lining piece to meet with their right sides together. The zipper will be in the middle. Fold the seam allowance of the zipper toward the lining and pin everything together on all four sides.
9. Sew the perimeter.
Sew around all four sides of the piece, using a 1/2″ seam allowance and a regular presser foot. Leave an opening of about 4″ on the bottom of the lining side, which will be used to turn the bag right side out.
10. Make the corners.
If you prefer a flat bag, you can skip this step. But if you’d like to make corners to add depth to the bag, here’s how: fold the fabric at the corners so that the side and bottom seams meet. Measure from the point of the corner; here I used a depth of 1″, but if you prefer a deeper bag, just measure further from the corner. Mark the line with a pin.
11. Sew the corners.
Sew along the line you marked with the pin, backstitching to reinforce at the beginning and end of the seam. Trim away the excess fabric, cutting about 1/4″ from the seam.
Here’s how the piece will look after you’ve sewn and trimmed all four corners.
12. Turn it right-side out.
Turn the bag right side out, carefully working the bag through the opening you left in the lining. Press all the seams, then sew the lining closed by hand.
Turn the lining to the inside of the bag, and you’re done!


0 comments:
Post a Comment