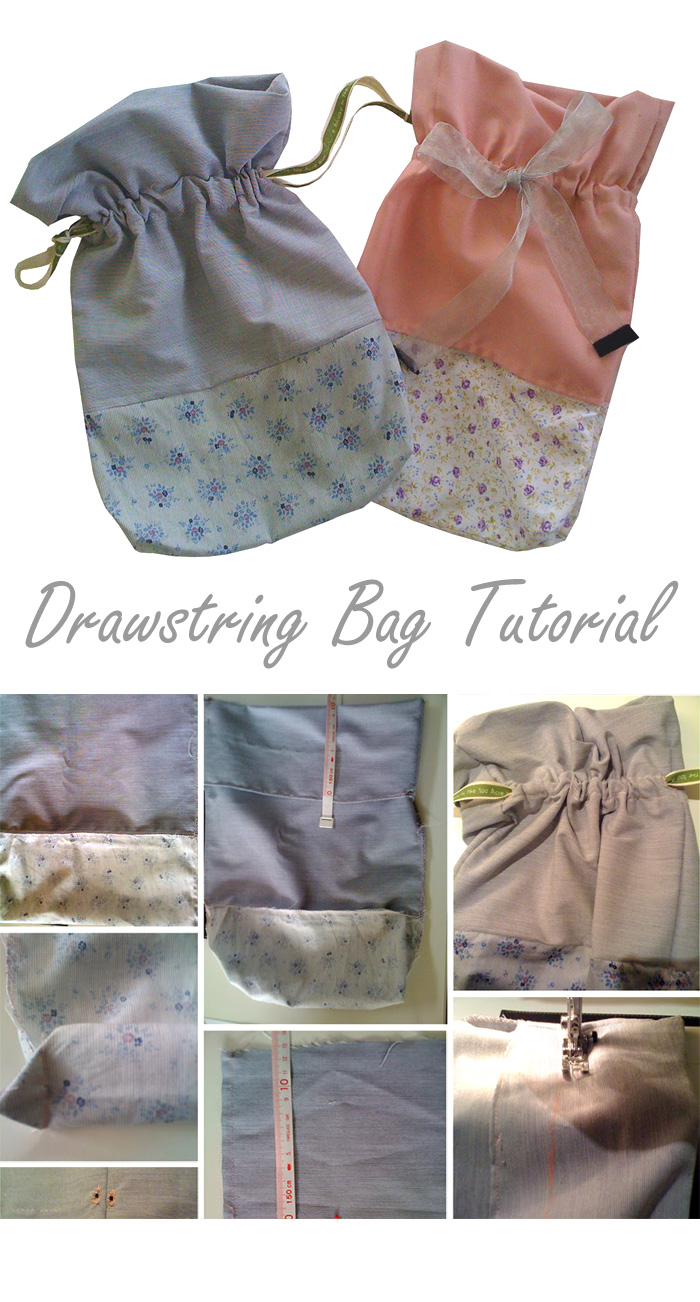
Make your own Drawstring Bag. Free Sewing Tutorial
Materials needed
Fabric Solid: 30cm (L) 25cm (W)
Fabric Print: 12cm (L) 25 cm (W)
Webbing or Ribbon
Cut out your fabric, you should have 4 pieces in total. Sew down your two fabrics, print & solid. Do this for both pieces.
Sew the two side edges down, leaving the top of the solid fabric open.
Flatten out the bottom, it should form two triangles on either side. Sew closed about 4 - 5 cm in. Snip off., this makes the bottom of your bag.
From the top, measure down about 10 - 12cm. Mark four places for your buttonholes, one on either side of your fabric.
Make your buttonholes, two on each side. Remember to make the buttonholes on the ride side of your fabric. They do not have to be very big.
Next, take your bag & turn it inside out. Fold down the top around 10 - 12cm.
Draw two straight lines with your chalk and sew all the way around.
Make sure your lines do not sew over your buttonholes, so one line above and one line below.
Take your ribbon or webbing, starting from the one side pull it through your button holes.
Please let me know if you have any questions or comments!
Tie the one end up & its ready for use!


0 comments:
Post a Comment